- Book An Event
- FLOWERS & GIFTS
- GARDEN SHOP
- EXPERIENCES
- BLOG
- ABOUT
- Log in
Step-by-Step: How to Start Flower Seeds Indoors for a Beautiful Garden
March 02, 2023 1 Comment

Starting a flower garden from seed is fun and exciting! There is always something new to learn and discover when it comes to sowing flower seeds. In all that we do here on the farm, seed starting is the most magical and to boot - a high valued skill to have. In this blog post, we will guide you step by step through the process of sowing flower seeds and provide helpful tips for troubleshooting common problems.

Step 1: Choose the Right Seeds
Consider factors such as the size and habit of the flowers you are interested in growing and the time of year they will bloom. Refer to our blog post on How To Plan for Seed Starting Indoors to walk you through this initial step.

Step 2: Choose a Container
For a home gardener, a 32 celled tray is the best size for starting flowers. These trays are small enough to fit easily on a windowsill, but large enough to provide enough space for your seeds to grow and develop a nice rootball. For a very serious gardener or grower, consider starting seeds in a 72 celled tray or higher. To help you decide what works best for your growing space and conditions, check out Mastering the Art of Transplanting Flower Seedlings where we walk you through container sizing and space efficiencies. Download our container sizing guide here.

Step 3: Fill Your Container with Soil
Fill your containers with a good quality seed starting soil. This soil should be light and airy, allowing your seeds to easily germinate and grow. Make sure you gently pack the soil down, leaving a small indentation in the center of each cell where you will place your seeds. The soil does not need to be watered at this point.

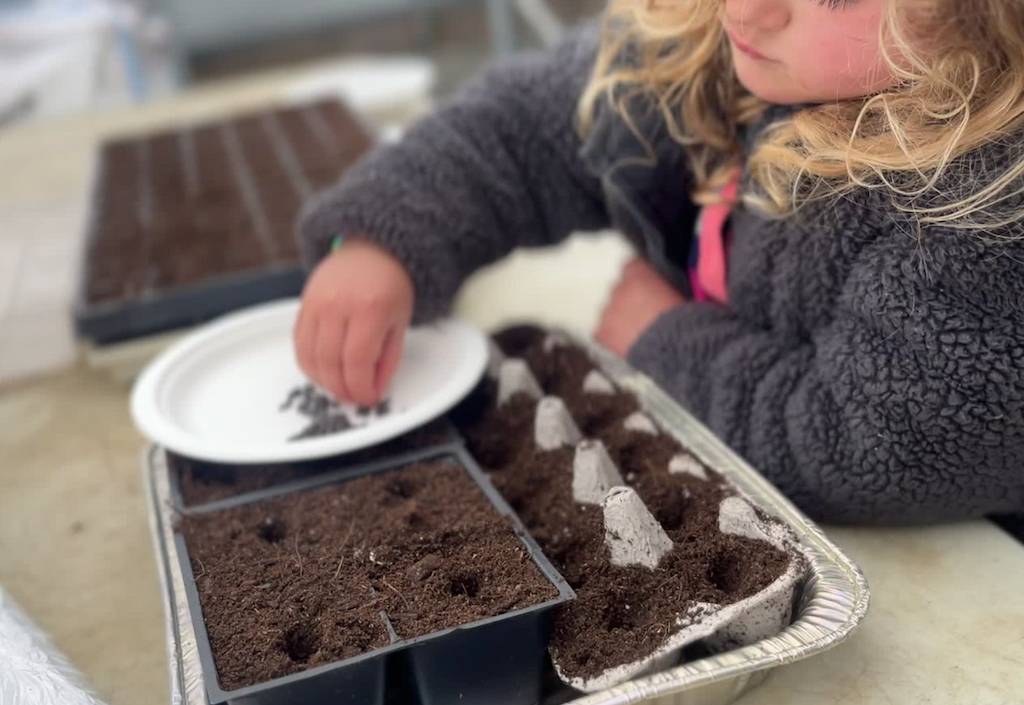
Step 4: Sow Your Seeds
Now it's time to sow your seeds! Simply place one or two seeds in the center of each cell, covering them with a light layer of soil. Oftentimes, we sow 2-3 seeds per cell. This guarantees something will sprout and we can always go back and pinch out the weaker plants. Make sure you label the type of flower you are growing, so you can keep track of which seeds are which.

Pro tip! Instead of sprinkling a light layer of soil over your seeds, supplement with vermiculite. Vermiculite is a naturally occurring mineral that takes the form of shiny flakes. It is used to improve soil quality and give seedlings a helping hand. It’s naturally antimicrobial and will help to keep your seeds moist. If you have trouble with a green layer forming on top of your seeds, try using vermiculite.

Step 5: Water Your Seeds
Water your seeds gently, being careful not to disturb the soil. The best way to do this is by bottom watering. Make sure you water your seeds until the soil is evenly moist, but not soaking wet. Filling the tray that will hold the water so that there is a water line a third of the way up your tray. Then cover with a humidity dome or clear wrap — this ensures the seeds stay in a humid environment. You should not have to water again until you take your clear covering off. Take off the covering when 80% or more of your seedlings have sprouted.

Step 6: Place Your Container in a Warm Location
Place your seedlings in direct sunlight at a windowsill or under grow lights. The added benefit of bottom heat from a heat mat will improve your germination rate and uniformity. Not necessary but it will improve results. The room should be between 70-75°F or set your heat mat thermostat to 70F for most annual flowers. This will help your seeds germinate quickly and grow strong and healthy. Refer to our Bulletproof Seed Starting Station for inspiration and guidance.

Step 7: Monitor Your Seeds
Check your seeds daily, making sure the soil remains moist but not soaking wet. If water is pooled at the bottom of your tray, that’s too much and drain it out. A layer of condensation should always be on the inside of your humidity dome or clear wrap. If you do not see condensation, they are too dry and you need to water.
Troubleshooting Points:
- Poor Germination: Poor germination can be caused by several factors, including planting the seeds too deep, not providing enough warmth, moisture, or light, or by using old or expired seeds. If you are experiencing poor germination, make sure you are following the steps outlined in this blog post carefully, and consider using fresh seeds for your next batch. Be sure to review the growing conditions such as light requirements or cold stratification.
- Slow Growth: If your seedlings are growing slowly, this may be due to a lack of sunlight, warmth, or poor soil fertility. To resolve this issue, make sure your seedlings are receiving enough light, and consider using a high-quality fertilizer to improve the soil's fertility. You may also want to check the quality of the water you are using to water your seedlings, and consider using filtered or distilled water if necessary.
- Disease: Diseases can be a common problem when growing from seed. To prevent these issues, make sure you are using a fresh seed starting mix, and avoid overwatering your seedlings. If you do experience disease, consider using an organic method to control the problem, or remove the affected seedlings and start over with fresh seeds. The most common problem is to develop algae on top of the soil from overwatering and poor air circulation.

Starting a flower garden from seed can be a fun and rewarding experience, but it does require patience, attention to detail, and a bit of know-how. By following the steps outlined in this blog post, you can be sure that your seedlings will have the best possible start in life, and will grow into strong and healthy flowers that will bring beauty and joy to your garden for years to come.
HOW TO START FLOWER SEEDS INDOORS VIDEO
INDOOR SEED STARTING SUPPLY LIST
Don't forget to check out our previous blog posts on indoor seed starting for even more information on starting a cut flower garden.
Starting Seeds Indoors: How to Build a Bulletproof Seed Starting Station
1 Response
If your comment doesn’t show up right away, don't fret! We have a spam filter that requires we approve most comments before they are published.
Unable to post at this time.
Also in Farm Journal

Rooted Flowers Holiday Gift Guide 2025
December 11, 2025
As another season comes to a close here at the farm, I’ve been reflecting on how much Rooted Flowers has grown and evolved. Each year feels like a whirlwind of planting, tending, harvesting, and planning for what comes next. With so much happening behind the scenes, I wanted to take a moment to gather everything we’re offering this holiday season in one place.

Bloom & Brunch: A Mother’s Day to Remember
May 29, 2025
This past Motherʼs Day, we opened the gates to Rooted Flowers for our very first Bloom & Brunch, and what unfolded felt like something out of a dream. After weeks of gray skies and unpredictable spring weather, the sun showed up right on cue—and so did all of you.

A Pastel Spring Wedding at Valley View Farm
May 27, 2025
This past weekend, we had the pleasure of designing wedding florals for a stunning celebration at Valley View Farm in Haydenville, MA. From seed to centerpiece, every flower was grown right here on our farm in Agawam, MA—a full farm-to-table floral experience for a couple who wanted something meaningful, local, and naturally beautiful.
Quick Links
Follow Us
We a family-run speciality cut flower farm growing in the Pioneer Valley of Western Massachusetts.
Our self-serve farmstand is located at 501 Shoemaker Ln, Agawam, MA 01001. We are open everyday with a fresh restock at 10 am.
Find us on Google Maps or Apple Maps
News & Updates
Sign Up For Our Newsletter
© 2026 Rooted Flowers. © COPYRIGHT ROOTED FLOWERS LLC 2024


Patti Kinney
October 09, 2023
When my flower seeds start to grow and then do I need to do anything to make them spread out and thicker